


vRealize Automation 8/Cloud provides a comprehensive platform to offer service as part of a catalog experience. Users that have been assigned to projects and catalog items can select from the services available and request those accordingly. If new users want to get access to the platform typically an admin user must grant them permissions to the components in question. In larger organizations it might be desired however that the users themselves can request access to services and hence keep away the administrative burden from the operations team. This should be enhanced by approval process in many cases to avoid uncontrolled resource usage.
vRealize Automation 8.2 does not have such a capability out-of-the-box. However, with the newly introduced support for Terraform services it’s pretty simple to build up an onboarding experience for new users in vRealize Automation.
This blog describes by an example how such architecture can be built up. It does not go into details on the Terraform integration. For details on this please refer to this blog or vRealize Automation documentation.
Preparation in vRealize Automation
In this example a new user should be able to request the creation of a new project. In the request screen he can specify a project name as well as select an “application catalog” which fits best to his project’s needs, see example request form below.
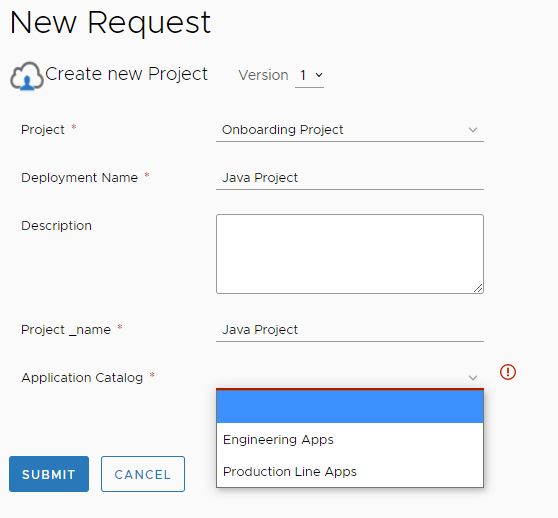
After successful request of the project, he will find additional catalog items that belong to the “application catalog” select. Also, he will become a member of the new project and can manage it accordingly.
Preparation in Cloud Assembly
As preparation we need to configure the application catalogs the user can select from. Technically they are represented by a combination of a project and the related Cloud Templates.
We have to create one project for each “application catalog”, see the example here:
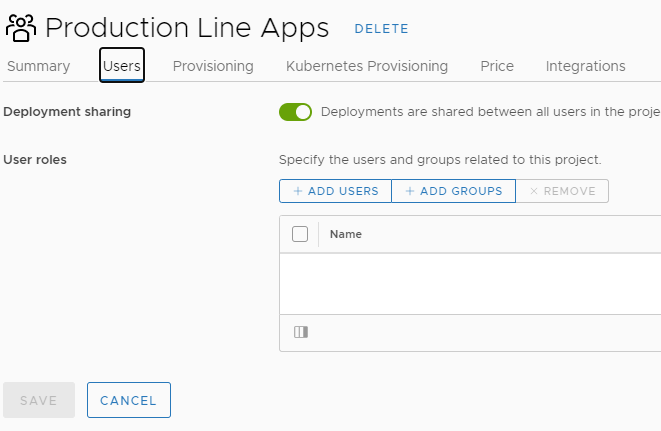
Those projects don’t have user roles assigned as they purely are used to structure the “application catalogs” and contain Cloud Templates (Blueprints).
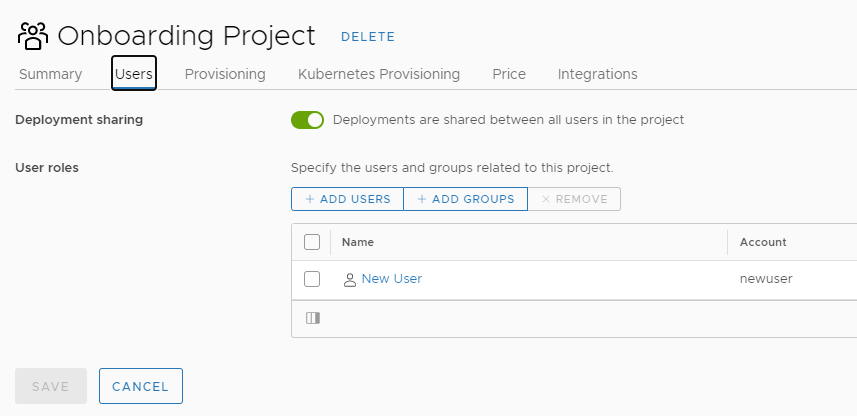
In addition, a project is required that does not have Cloud Templates assigned at all but contains all users that potentially can request a new project. In my case it just contains one example user “newuser”:
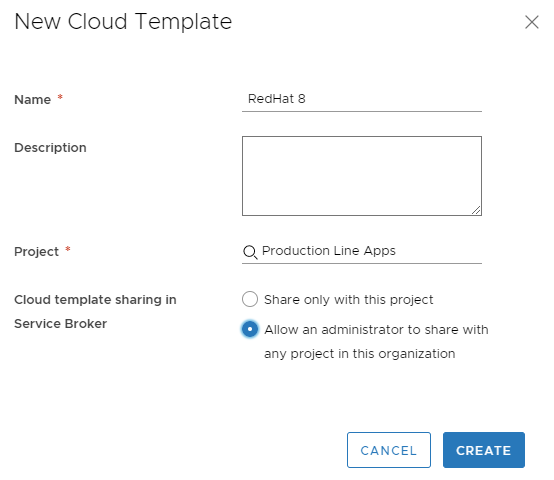
As next step Cloud Templates that should be part of the “application catalog” must be created. You can create whatever Cloud Templates you like. The most important point is that you select the proper project (application catalog) you want to assign them to and also change the radio button for Cloud Template sharing to “Allow an administrator to share with any project in the organization”.
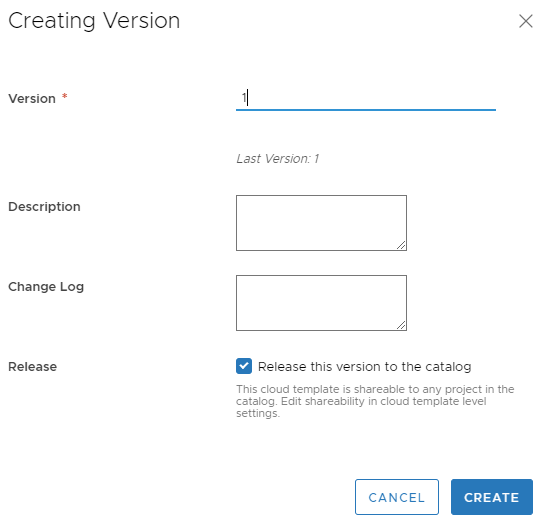
Once you have done that make sure you create a version of the Cloud Template and release it to the catalog.
Preparation in Service Broker
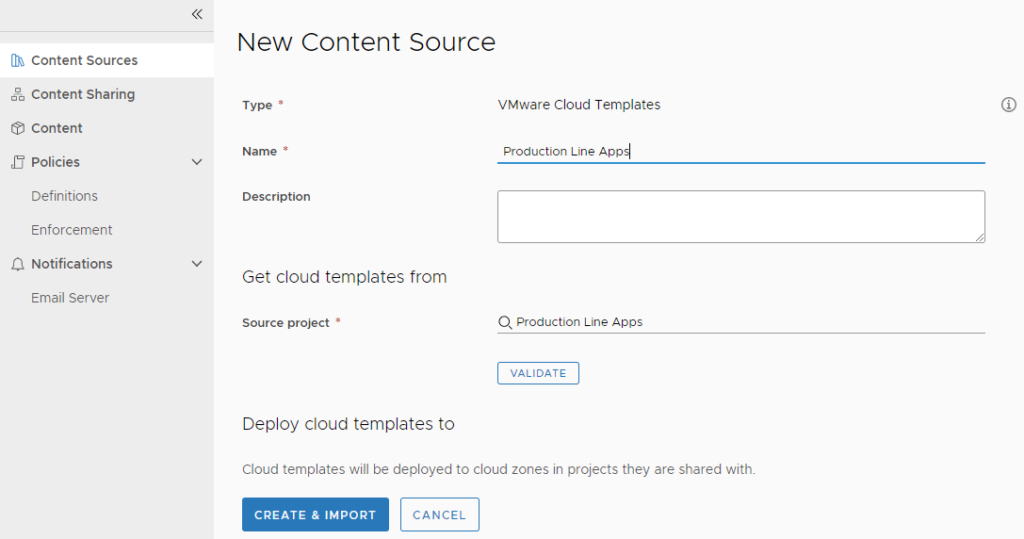
As we successfully created the “application catalog” Projects and assigned blueprints to them we need to import them into Service Broker. For this you must create a new Content Source of type “VMware Cloud Templates” and import the catalog items. This will be repeated for every “application catalog” type.
Preparation of the Project Onboarding catalog item
As we are leveraging the Terraform service for this purpose it’s required that you have successfully configured the Terraform integration in vRA. For vRA 8.2 this means e.g. that a Kubernetes cluster is available that can host the terraform execution engine. In vRA Cloud it’s already embedded. Also, a git repository must be available and integrated to store the Terraform files. Please make sure as well that the Terraform version available in vRealize Automation is at least 0.13.

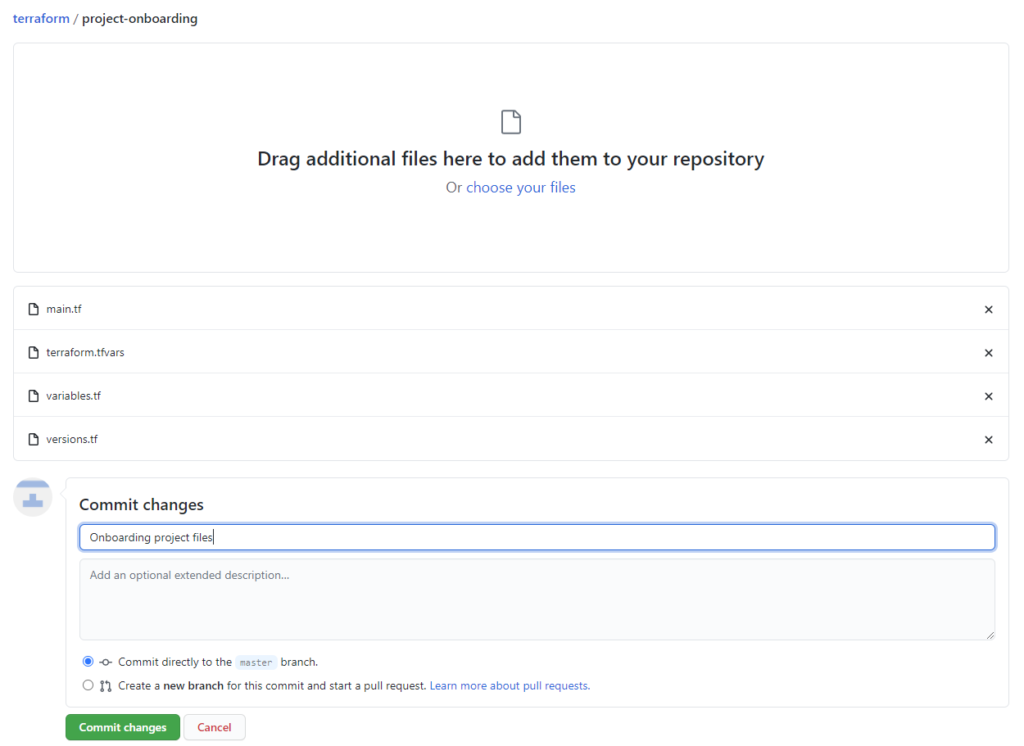
Once this has been done, the required Terraform files must be uploaded to the git repository and put into a folder. If you do that by a local git client, the folder structure on the git server will be created automatically. However, if you want to create a new folder in e.g. github the easiest way I found was creating a dummy file by specifying a folder path:

After commit the folder and the file have been created.
Now you can just download the required Terraform files from here, extract them somewhere and upload them into the new git folder. Make sure you add a proper commit changes description as this will be selected in the Cloud Template wizard later.
Creation of the Project Onboarding Cloud Template
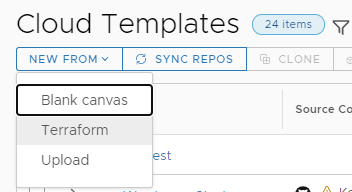
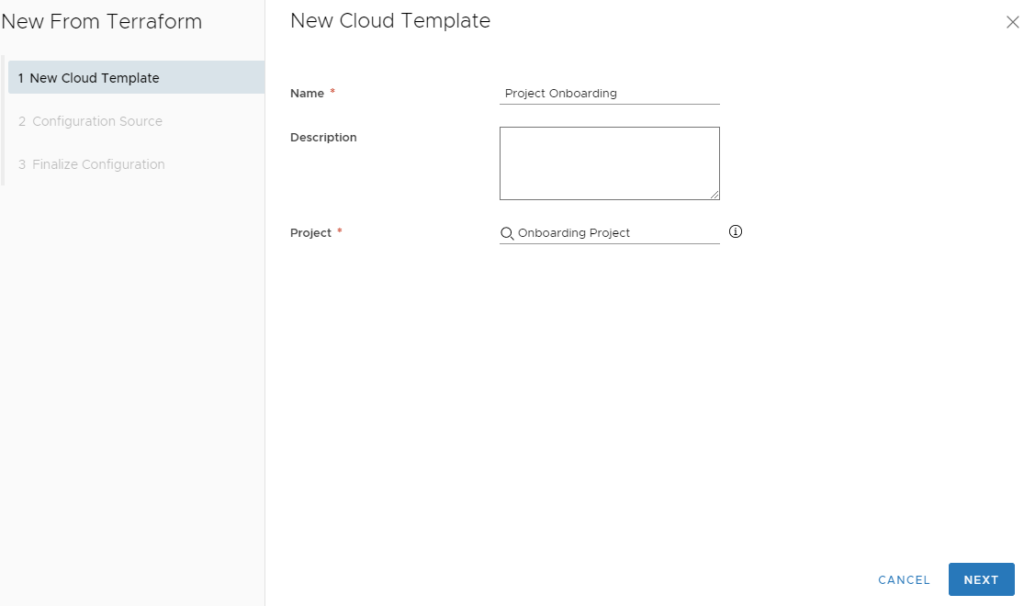
Now we are creating the Cloud Template for the project onboarding service:
Select Design Tab in Cloud Assembly and create new Terraform blueprint
Define name for new Cloud Template and Select the “Onboarding Project” created in an earlier step.
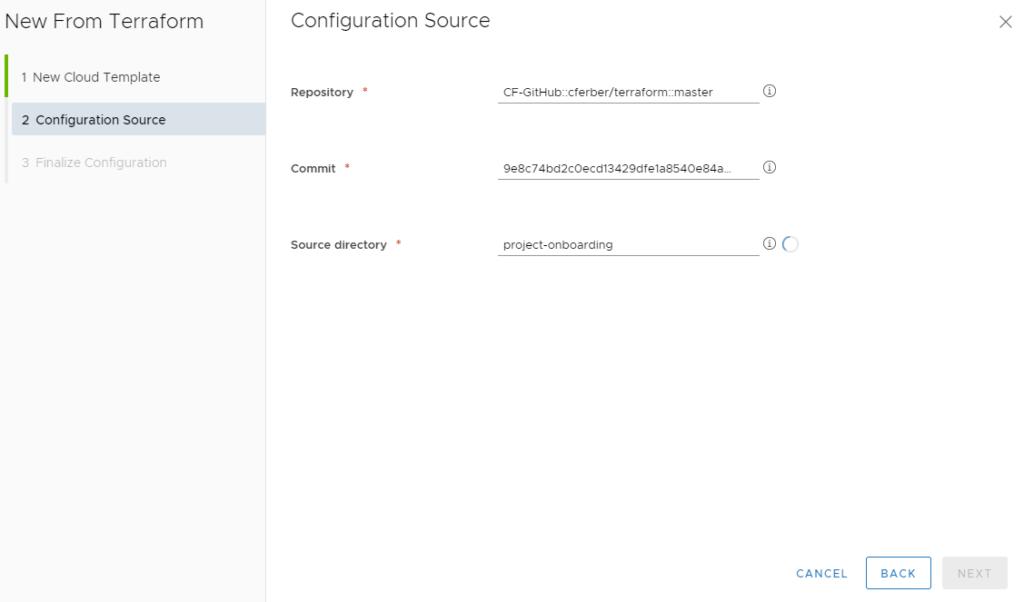
Select the Repository, Commit (see change description before) and source directory.
Finalize configuration and make sure that the required Terraform version (0.13 or higher) is present.
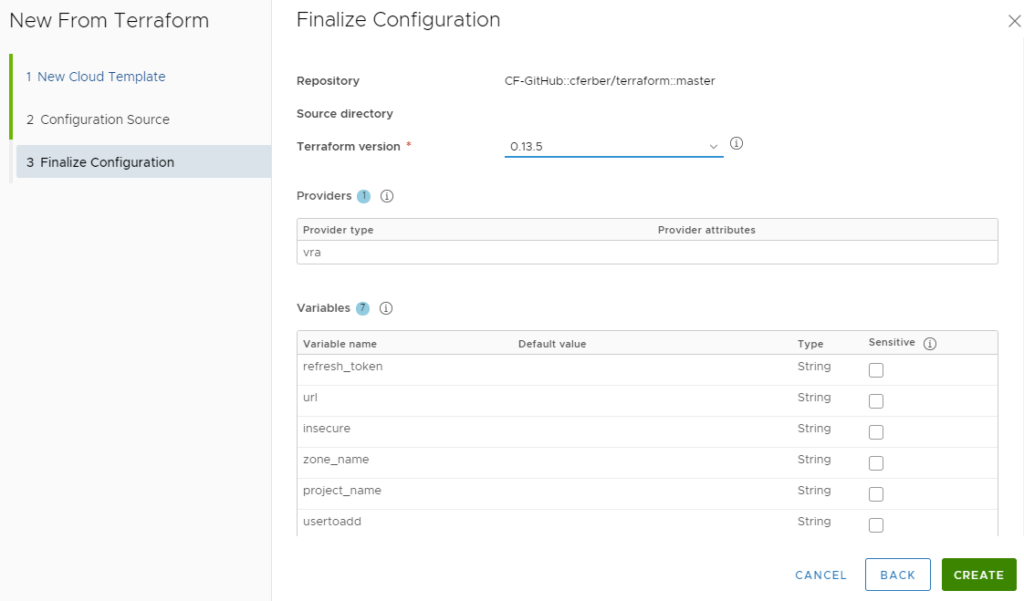
The resulting Cloud Template should look like this:
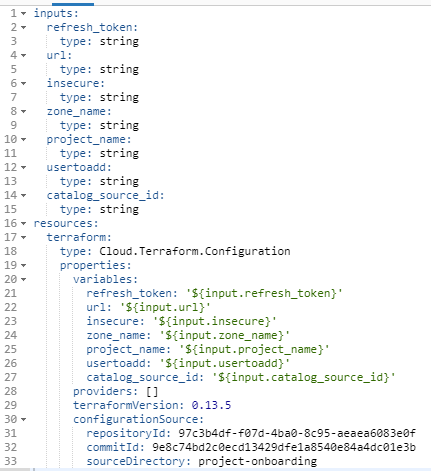
To make it usable in the way explained in the beginning of this blog, a couple of changes must be done on the Cloud Template. The Cloud Template imported all required values as inputs, however the ones that should not be changed by the user need to be converted to fixed values. Also, new inputs must be defined asking the customer for a project name and offering him the selection for the “application catalog”. See details in below screenshots.
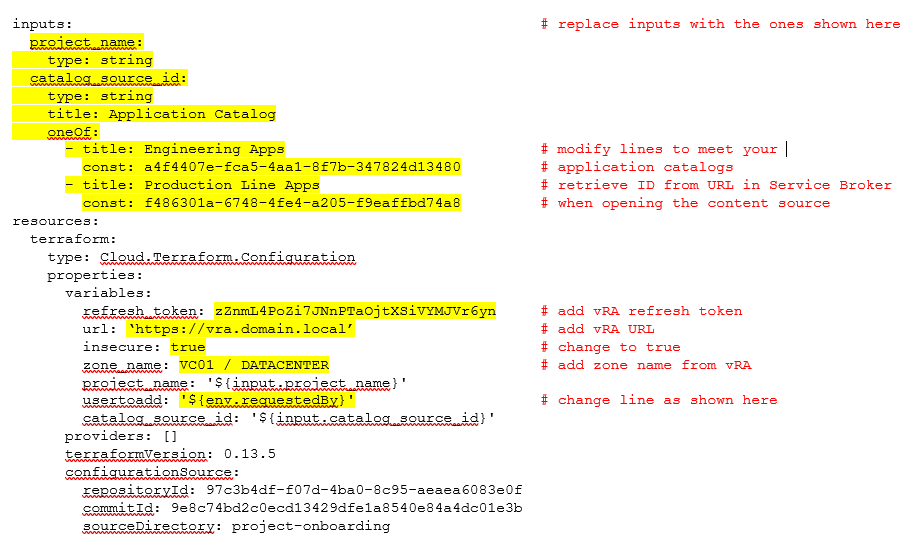
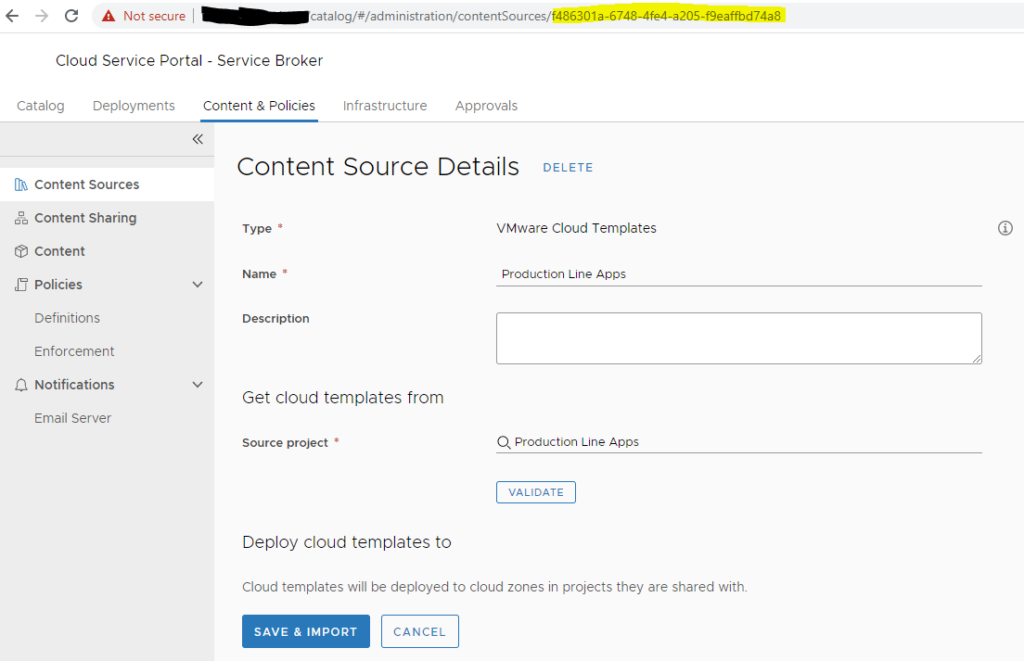
For retrieving the ID of the “application catalogs” go to Service Broker and open the content source. The ID can be copied from the URL.
For more details on how to get the vRA API refresh token, please refer to this manual.
Publishing the Project onboarding Cloud Template
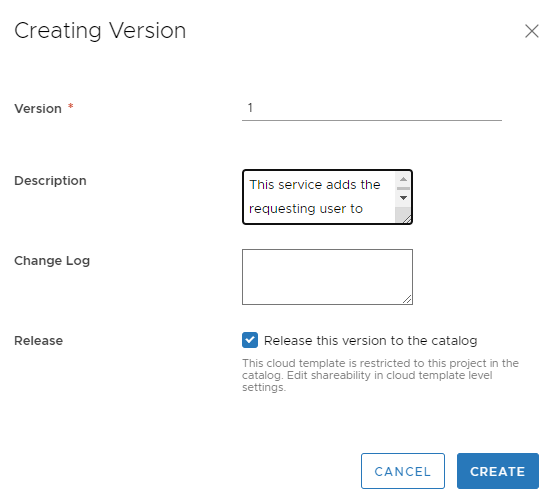
After modification of Cloud Template a new version must be created that is also released to the catalog.
Furthermore, you have to add a new content source to the Service Broker which imports the Cloud Templates into the catalog.

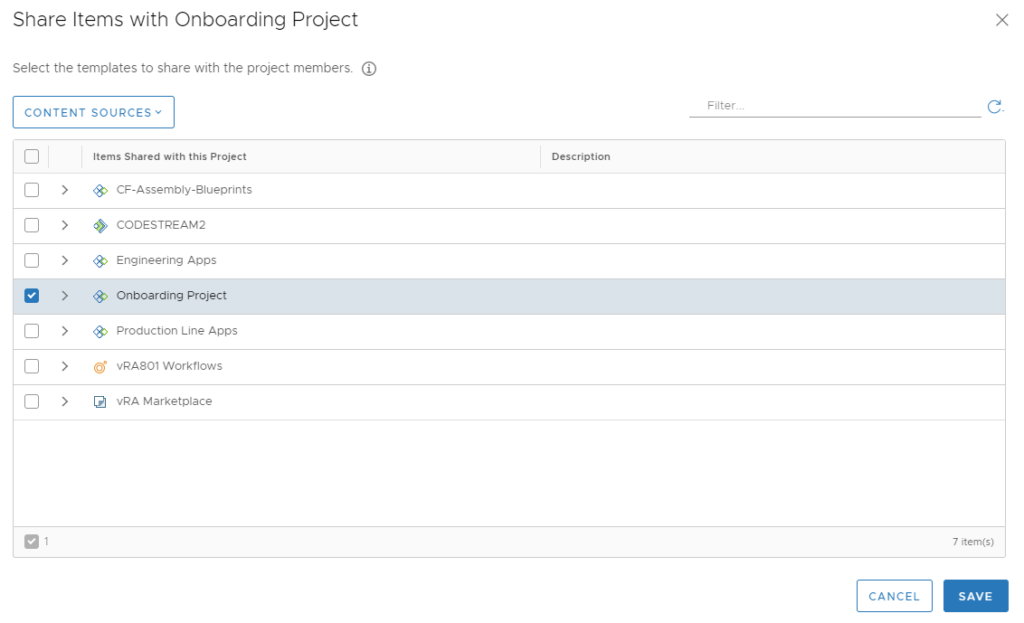
Before the item appears on the catalog, it must be shared with the project.
Once all configuration is done, the user that is entitled for the “Onboarding Project” will see only 1 catalog item “Onboarding Project”. Once he requested the catalog item, specified a project name and selected and “application catalog”, he will see new catalog items appear on his catalog and also he is able to manage the new project under deployments view.
Have fun!

- Approval with Jira change ticket - 4. January 2024
- Automated SaltStack Minion Updates through winrepo - 9. November 2023
- Automated SaltStack Minion Updates - 27. October 2023